Every time someone visits your site, your server sends back a response. That response includes the page content (HTML, CSS, JavaScript) plus a set of headers, small instructions the browser reads before rendering anything.
Most headers are mundane: content type, cache duration, server software. But a handful of them are specifically designed to prevent attacks. These are your security headers.
Think of them as rules you're handing to the browser: "Don't load scripts from domains I haven't approved." "Don't let anyone embed my site in an iframe." "Always use HTTPS, even if someone types http://." The browser enforces these rules on every single page load, which means attackers can't bypass them with clever JavaScript or social engineering.
Here's why this matters for WordPress specifically: WordPress sites tend to run a lot of third-party code. Themes, plugins, analytics scripts, payment processors, chat widgets. Each one is a potential vector for cross-site scripting (XSS) or data injection. Security headers don't replace keeping your plugins updated, but they add a layer of protection that catches what your other defenses might miss.
There are dozens of HTTP headers you could set, but six of them carry the most weight for WordPress sites. Let's go through each one.
1. Strict-Transport-Security (HSTS)
What it does: Forces browsers to connect over HTTPS, even if someone types http:// or clicks an old HTTP link.
Why it matters: Without HSTS, there's a brief window during the first connection where an attacker could intercept an unencrypted request and redirect the visitor (a man-in-the-middle attack). HSTS eliminates that window entirely after the first visit.
Recommended value:
Strict-Transport-Security: max-age=31536000; includeSubDomains; preload
The max-age is in seconds (31536000 = one year). includeSubDomains applies the rule to every subdomain. preload lets you submit your domain to browser preload lists, so even the very first visit is forced to HTTPS.
Important: Only enable HSTS after you've confirmed SSL works correctly across your entire site. If anything is still served over HTTP (mixed content), HSTS will break those resources instead of silently loading them.
If you're on Levamo, free SSL certificates are issued automatically and renewed on every plan, so you're already set on that front.
2. Content-Security-Policy (CSP)
What it does: Controls exactly which sources the browser is allowed to load resources from: scripts, styles, images, fonts, frames, and more.
Why it matters: CSP is the single most powerful header against cross-site scripting. If an attacker injects a malicious script tag into your page, the browser checks the CSP policy. If the script's source isn't on the approved list, it doesn't execute. Period.
Example (starter policy):
Content-Security-Policy: default-src 'self'; script-src 'self' https://cdn.example.com; style-src 'self' 'unsafe-inline'; img-src 'self' data: https:; font-src 'self' https://fonts.gstatic.com; frame-ancestors 'none'
A word of caution: CSP is the most powerful security header, but also the easiest to get wrong on WordPress. Plugins and themes routinely inject inline scripts and styles, and a strict CSP will block them. Start with Content-Security-Policy-Report-Only to log violations without breaking anything:
Content-Security-Policy-Report-Only: default-src 'self'; script-src 'self' 'unsafe-inline'; report-uri /csp-report-endpoint
Monitor the reports for a week, adjust your policy, then switch from Report-Only to the enforced header.
3. X-Content-Type-Options
What it does: Prevents the browser from "sniffing" the content type of a response. If your server says a file is text/plain, the browser treats it as text, not as executable JavaScript.
Why it matters: Without this header, an attacker could upload a file with a .jpg extension that's actually a script. The browser might detect the real content type and execute it. This header stops that behavior.
Recommended value:
X-Content-Type-Options: nosniff
There's only one valid value. Set it and forget it.
4. X-Frame-Options
What it does: Controls whether your site can be embedded inside an <iframe> on another domain.
Why it matters: Clickjacking attacks work by loading your site in a transparent iframe on a malicious page. The victim thinks they're clicking buttons on the attacker's page, but they're actually clicking buttons on yours (approving transactions, changing settings, deleting content). X-Frame-Options prevents this entirely.
Recommended value:
X-Frame-Options: SAMEORIGIN
SAMEORIGIN allows your own site to use iframes (WordPress admin, some page builders, and preview features need this) while blocking external domains. Use DENY if you never need iframes at all.
Note: The modern replacement is the frame-ancestors directive in CSP. If you're using a full CSP policy with frame-ancestors, X-Frame-Options becomes redundant. But since not all browsers handle CSP identically, setting both gives you the widest coverage.
5. Referrer-Policy
What it does: Controls how much URL information your site shares when a visitor clicks a link to another domain.
Why it matters: By default, browsers send the full URL of the referring page. If your URLs contain sensitive parameters (session tokens, user IDs, search queries), that information leaks to every external site you link to. Referrer-Policy lets you limit what gets shared.
Recommended value:
Referrer-Policy: strict-origin-when-cross-origin
This sends the full URL for same-origin requests (your internal analytics still work) but only sends the domain name for cross-origin requests. No paths, no query strings.
6. Permissions-Policy
What it does: Controls which browser features your site can access: camera, microphone, geolocation, payment APIs, and others.
Why it matters: If a compromised plugin tries to activate the visitor's microphone or camera, this header blocks the attempt. It's especially relevant for WooCommerce stores where payment-related browser APIs are in play.
Recommended value:
Permissions-Policy: camera=(), microphone=(), geolocation=(), payment=(self)
Empty parentheses () mean "disabled entirely." (self) means "only my own domain can use this." Adjust based on what your site actually needs. If you use a chat widget with video, you'd add that domain to the camera permission.
Before adding anything, check what you're working with. Two quick methods:
Option 1: SecurityHeaders.com
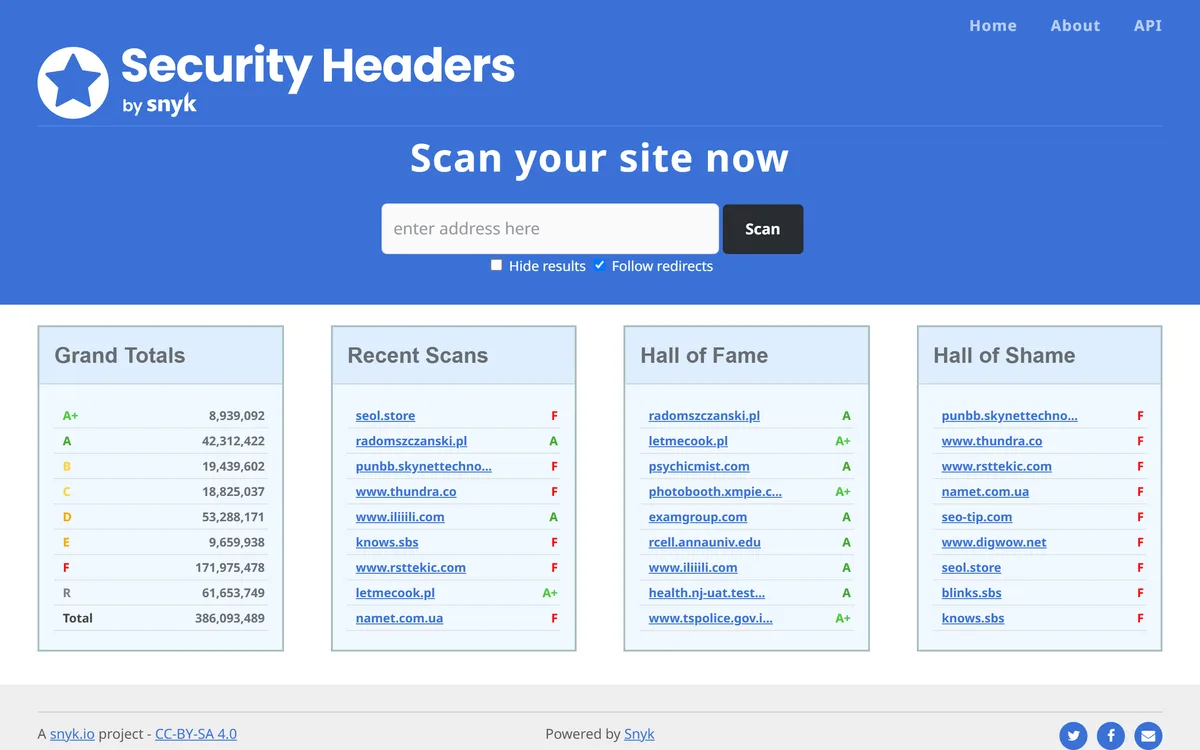
Go to securityheaders.com, enter your domain, and get an instant letter grade from A+ to F. The report shows which headers are present, which are missing, and what values they contain.
Option 2: Browser DevTools
Open your site in Chrome or Firefox, press F12, go to the Network tab, reload the page, click the main document request, and look at the Response Headers section. You'll see every header your server is sending.
Most WordPress sites score a D or F on their first check. Don't panic. That's exactly why you're here.
Method 1: .htaccess (Server-Level)
If your host runs Apache or LiteSpeed (Levamo uses LiteSpeed), you can add security headers directly in your .htaccess file. This is the cleanest approach because headers are applied at the server level before WordPress even loads.
Add this block to the top of your .htaccess file in your WordPress root directory:
<IfModule mod_headers.c>
Header set Strict-Transport-Security "max-age=31536000; includeSubDomains; preload" env=HTTPS
Header set X-Content-Type-Options "nosniff"
Header set X-Frame-Options "SAMEORIGIN"
Header set Referrer-Policy "strict-origin-when-cross-origin"
Header set Permissions-Policy "camera=(), microphone=(), geolocation=(), payment=(self)"
Header set Content-Security-Policy "default-src 'self'; script-src 'self' 'unsafe-inline' 'unsafe-eval'; style-src 'self' 'unsafe-inline'; img-src 'self' data: https:; font-src 'self' data: https://fonts.gstatic.com; frame-ancestors 'self'"
</IfModule>
Why unsafe-inline and unsafe-eval in the CSP? WordPress core and most popular plugins (Elementor, WooCommerce, Yoast) rely heavily on inline scripts and eval(). A production WordPress CSP almost always needs these directives. You can tighten this later using nonces if your theme supports them, but starting with unsafe-inline is pragmatic and still provides meaningful protection via default-src 'self'.
Before editing .htaccess: Create a backup. A syntax error in this file can take your entire site offline. If you're on Levamo, one-click staging lets you test changes safely before pushing to production.
Method 2: WordPress Plugin
If you're not comfortable editing server files, a plugin handles it through the WordPress admin:
HTTP Headers: Full control over all security headers with a visual interface.
Headers Security Advanced & HSTS WP: Focused specifically on security headers with sensible defaults.
Really Simple SSL Pro: Includes security header management alongside its SSL features.
The trade-off: plugins add a small amount of processing overhead (WordPress has to boot before headers are sent), and you're adding another dependency to keep updated. For most sites, this overhead is negligible. But if you're comfortable with .htaccess, server-level is cleaner.
Method 3: Cloudflare (Edge-Level)
If your site is behind Cloudflare, you can add security headers at the edge using Transform Rules. This is the most performant option because headers are injected before the response even leaves the CDN.
In the Cloudflare dashboard:
Go to Rules > Transform Rules > Modify Response Header
Create a new rule
Set the condition to match all traffic (or specific paths)
Add each header as a "Set static" action
The advantage here is significant: headers are applied at Cloudflare's edge network, which means they work even if your origin server is down. They also can't be accidentally overwritten by a plugin or theme.
Levamo includes Enterprise Cloudflare CDN on every plan with 300+ edge locations, so you get the performance and security benefits without managing a separate Cloudflare account. If you need custom header configuration at the edge, Levamo's support team can help set it up.
Common Mistakes to Avoid
Starting with a strict CSP and breaking your site. Always begin with Content-Security-Policy-Report-Only. WordPress plugins inject scripts from all over the place. A strict CSP will block them, and your contact forms, sliders, analytics, and payment gateways will stop working. Report-Only mode lets you find every source you need to whitelist before enforcing.
Setting HSTS before fixing mixed content. HSTS tells the browser to never use HTTP. If you have images, scripts, or embeds still loading over HTTP, HSTS won't silently upgrade them. They'll just break. Run a mixed content checker first. Check your WordPress Address and Site Address in Settings > General to make sure both use https://.
Duplicating headers. If you add headers in .htaccess and a plugin adds the same ones through PHP, browsers receive both values. Some headers handle duplicates gracefully (CSP merges them), but others don't. X-Frame-Options with two different values leads to unpredictable behavior. Pick one method and stick with it.
Setting and forgetting. When you install a new plugin that loads external scripts (analytics, chat widgets, payment processors), your CSP needs updating. Otherwise the plugin silently fails. Make security header review part of your plugin installation workflow.
Security Headers and Your Broader Security Stack
Security headers are one layer. They're a strong one, but they work best alongside other defenses.
If you've already followed WordPress security best practices like keeping plugins updated, using strong passwords, and enabling 2FA, security headers close the remaining browser-side gaps. Combined with a Web Application Firewall that blocks malicious requests before they hit your server and SSL/TLS encryption protecting data in transit, you've got coverage at every layer: network, server, application, and browser.
That's the concept of defense in depth. No single measure is foolproof, but stacking them makes a successful attack require bypassing multiple independent systems. Security headers handle the browser layer, and they're the layer most WordPress sites completely ignore.
Here's a production-ready set of security headers for most WordPress sites. Copy this into your .htaccess and adjust the CSP sources based on your plugins:
<IfModule mod_headers.c>
# Force HTTPS
Header set Strict-Transport-Security "max-age=31536000; includeSubDomains; preload" env=HTTPS
# Prevent MIME sniffing
Header set X-Content-Type-Options "nosniff"
# Block clickjacking
Header set X-Frame-Options "SAMEORIGIN"
# Limit referrer data leakage
Header set Referrer-Policy "strict-origin-when-cross-origin"
# Restrict browser features
Header set Permissions-Policy "camera=(), microphone=(), geolocation=(), payment=(self)"
# Basic CSP (adjust sources for your plugins)
Header set Content-Security-Policy "default-src 'self'; script-src 'self' 'unsafe-inline' 'unsafe-eval'; style-src 'self' 'unsafe-inline'; img-src 'self' data: https:; font-src 'self' data: https://fonts.gstatic.com; connect-src 'self'; frame-ancestors 'self'"
</IfModule>
After adding these, retest at securityheaders.com. You should jump from a D/F to an A or A+.
Wrapping Up
Security headers are one of those rare wins where the effort is tiny and the payoff is huge. Ten minutes of configuration blocks entire categories of browser-side attacks that your firewall, your SSL certificate, and your security plugins simply don't cover.
Start with the easy ones: X-Content-Type-Options, X-Frame-Options, Referrer-Policy, and Permissions-Policy are safe to deploy right now with zero risk of breaking anything. Add HSTS once you've confirmed your SSL setup is clean. And take your time with CSP. Use Report-Only mode, watch what breaks, whitelist what's legitimate, and enforce when you're confident.
The goal isn't a perfect A+ score on day one. It's closing the browser-level gap in your security stack so that every layer, from the network edge to the application to the browser, is actively working to protect your site and your visitors.